Miss Gioia

Monday, June 15, 2009

Punker Dolly


Another doll from the Wee Wonderful "Olive" pattern. This one was for a friend who still is an 80's punk rocker at heart (and with a birthday last week). Chris found the skull fabric for me at a Bernina event we attended recently.

The photo was taken by another friend of mine.

Labels: ,

Monday, April 28, 2008

Doll Hospital


I rescued this baby from my mother's attic. She has the name "Alexander" and 1977 imprinted on the base of her neck, so she probably belonged to me when I was little. She doesn't look like a Madam, but what do I know?*

She came to me this second time a little ragged, well worn. Her body was stained, and she was spilling cotton out of her crotch (sadly). Baby was in need of a little scrub-a-dub and some stitching up.

I first tried non-invasive procedures. I washed her with dishsoap and a toothbrush to get out the stains. I then sat her outside to dry. But it did not quite work. She was still wet after two days, and her tummy had started smelling funny. More stains came out of the fabric and she looked (and smelled) worse than before. The diagnosis was: time for surgery. There was no choice. Had to be done.

So I slit open her belly and removed all of her now-sodden cotton stuffing. I dunked her in a bucket of hot soapy detergent and went to work with a stiff scrubbing brush. After a thorough rinsing, she went straight into the dryer. A few tumble tumbles later, she came out all dry and clean. It worked.

I then pulled out my bag o' wool, stuffed her back up, and sutured up the belly. Good as new. The problem is, though, that she does not have a name. Surely I gave her one when I was a kid, but I cannot remember. Perhaps Gioia can think of a new one.


*UPDATED - She is indeed a Madame Alexander: a "Sweet Tears" baby doll.

Labels:

Wednesday, October 24, 2007

Chicago Babies

Chris has the good fortune of visiting all of our friends (and all of their new babies!) while he is in Chicago. Look at this crazy photo of a man who was formerly petrified of holding a little one. Practice up, darlin'.


And remember the baby doll that I made for Zane this summer? It seems that he is a big hit. So to all of you gender-biased skeptics out there - boys DO like dolls.


Ha!

Labels:

Wednesday, September 12, 2007

New England Dolly

Remember the summer contest dolly? Well she made at all the way to New England to live with her new family. Looks like she fits in just fine.


Such beautiful dogs. Seems they like to sleep as much as Frankie does.


Stuckinanofficeinnyc - I am glad she made it to you safely. Thanks for sharing the pictures!

Labels: ,

Monday, August 13, 2007

Hair and Faces

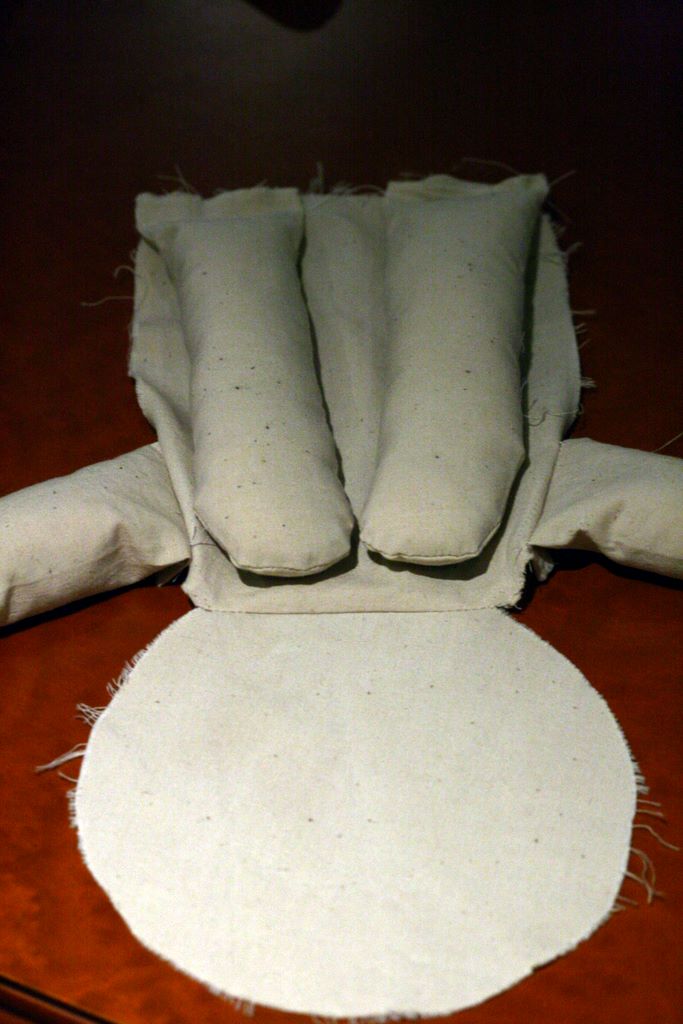
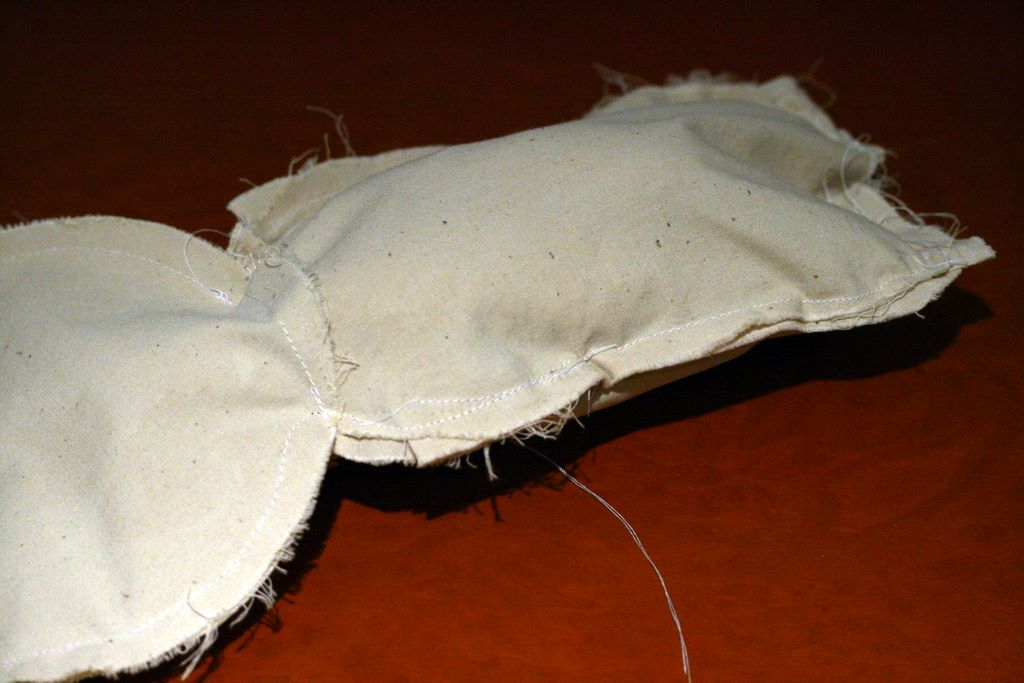
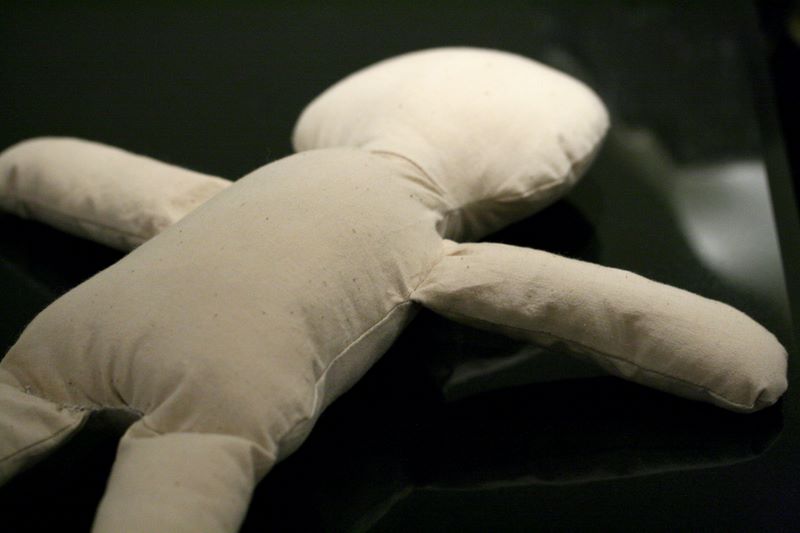
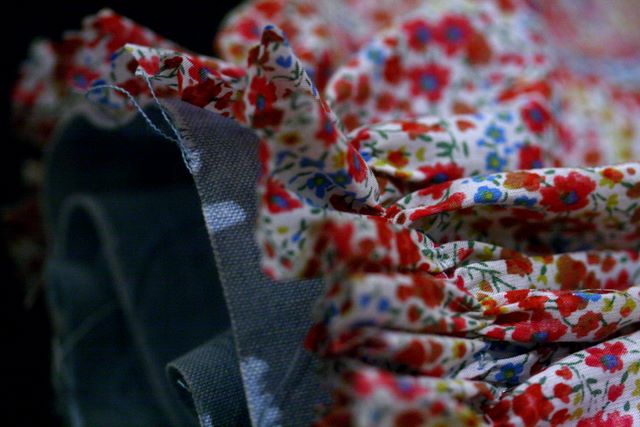
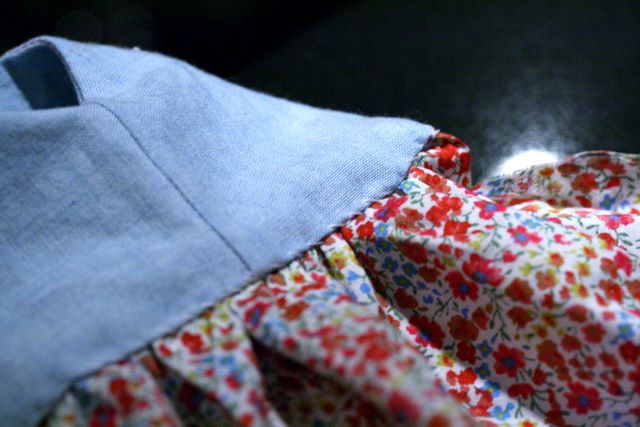
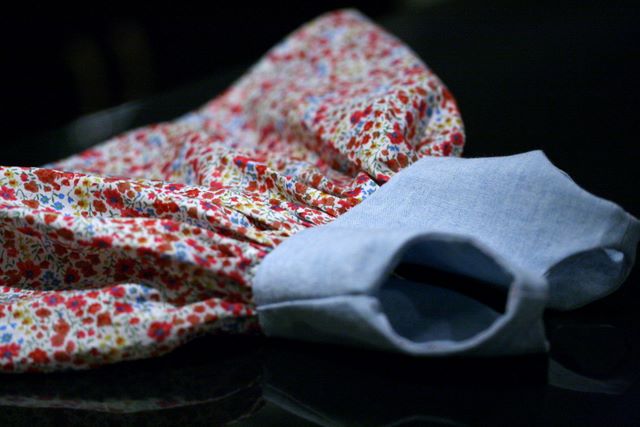
Elisa is working on a baby from my rag doll tutorial. (How fun is that!?) She reminded me that I was going to post later about hair, but never did. Elisa also asked a great question about embroidering faces. So, while this post will not be a true hair and face tutorial, perhaps it will be enough to help Elisa finish her baby.
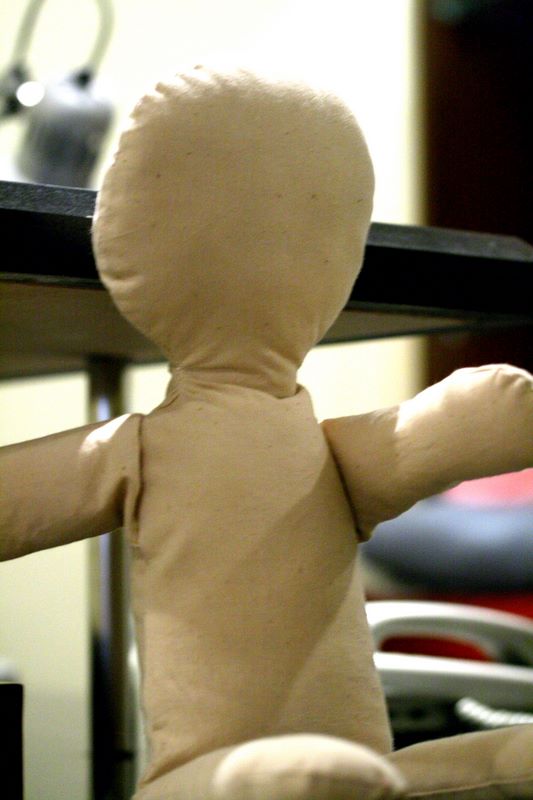
Making the Face

Question: Why isn't the face embroidered first, before the doll is sewn and stuffed?

Answer:
Well, you can do it that way too, if you like. But the advantage of adding the face after the stuffing is that you can tailor the face to the 3D shape of the stuffed doll. A flat face is different from a round/oval/curved face. What looks good in 2D may look weird in 3D.


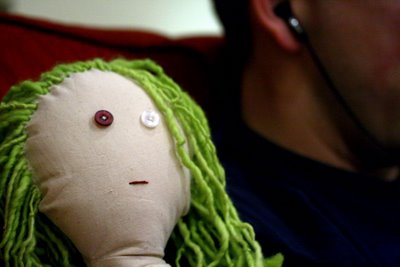
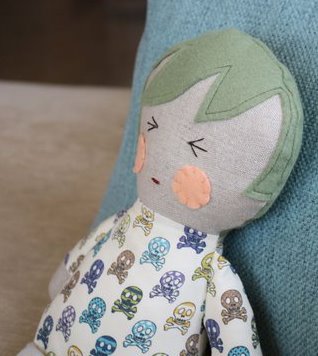
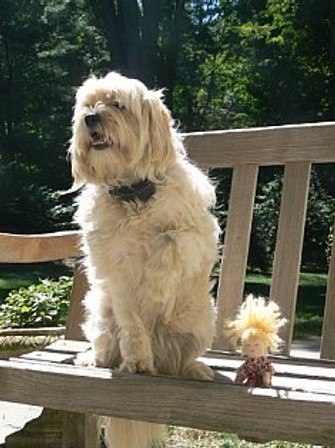
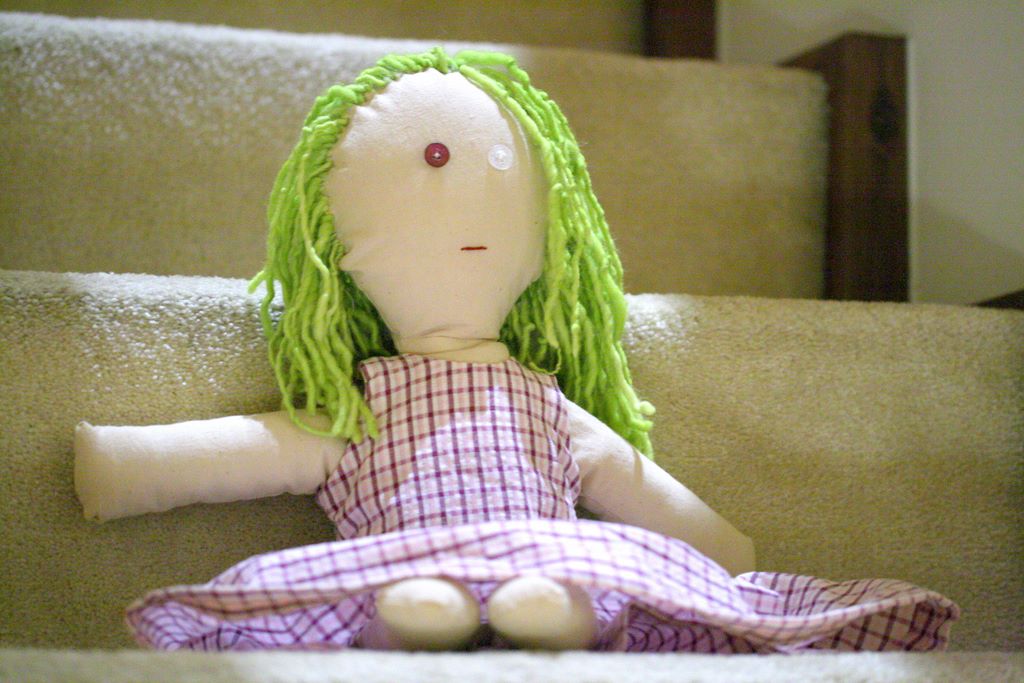
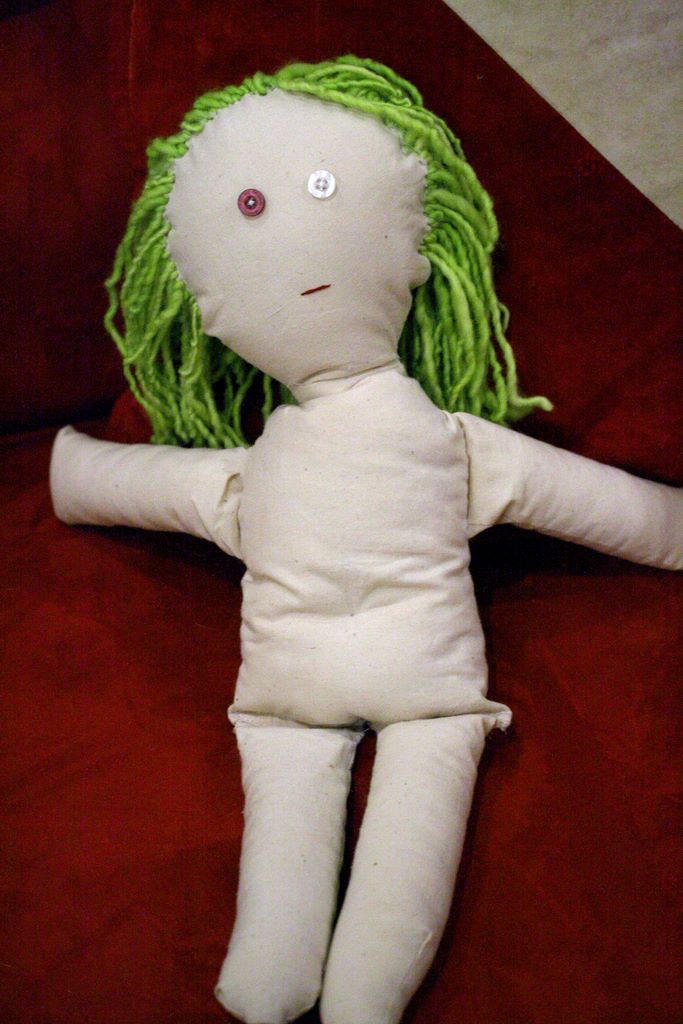
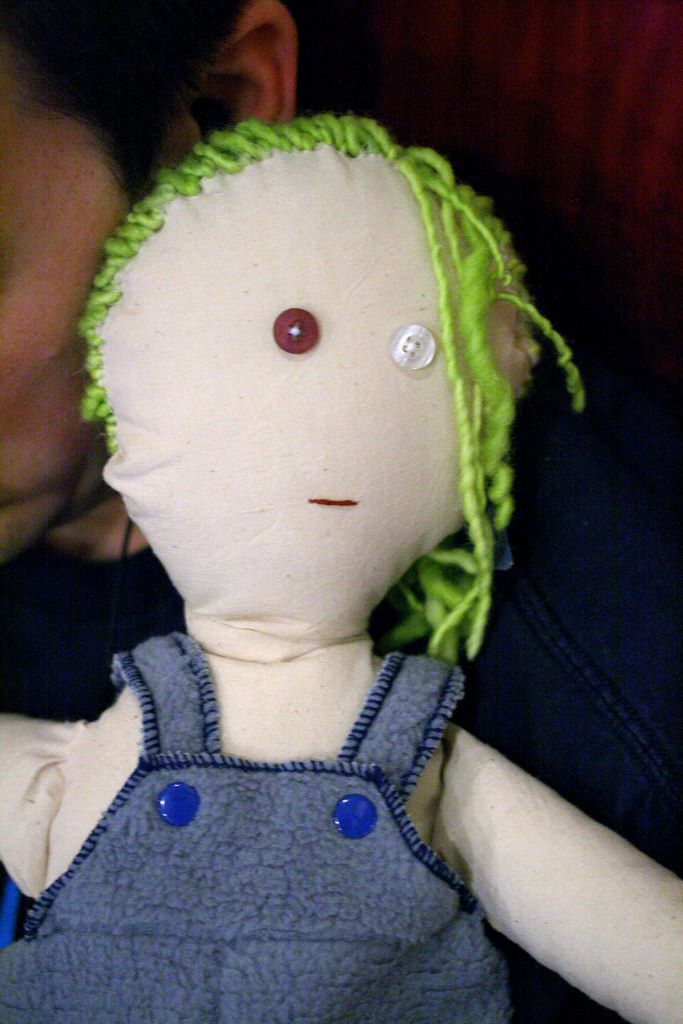
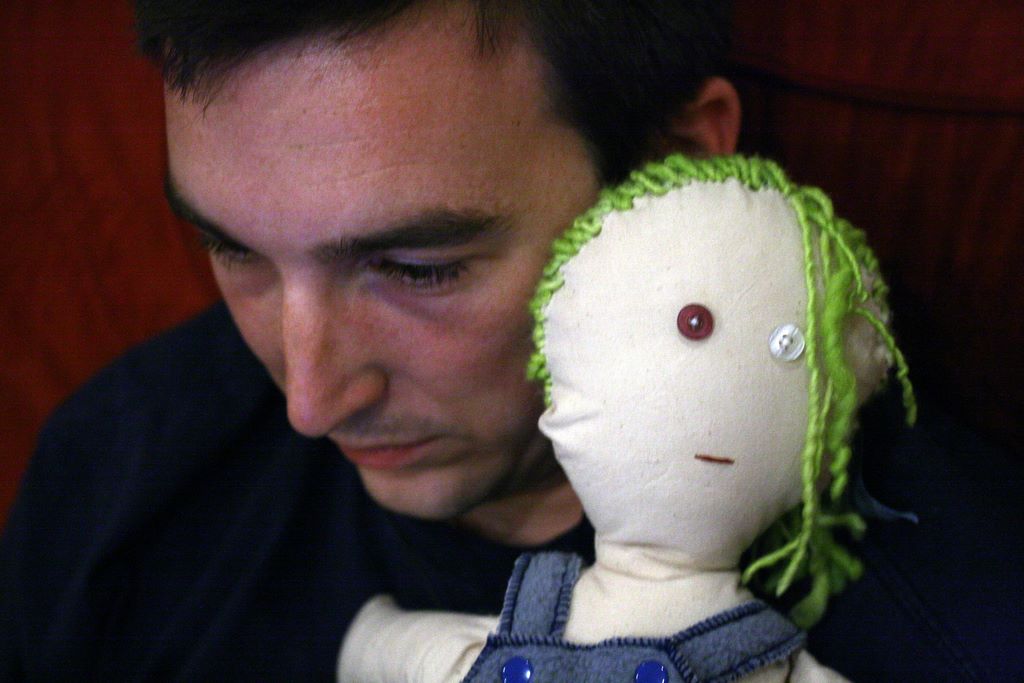
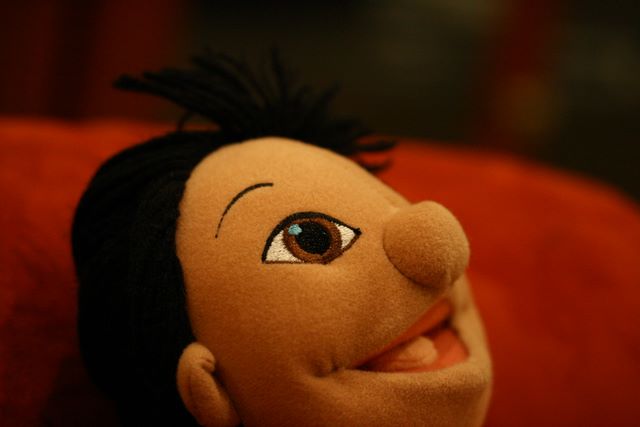
You have many options in finishing your face. The easiest method is to add buttons for eyes, as my husband did with Tiddley above. Of course this is not a good idea for a doll destined for a child under three. You can also use felt shapes to make eyes, cheeks and other features. Mimi does felt faces exceptionally well. She sometimes uses scrapbooking tools to cut out the perfect shapes - like circles cut in half for eyes - and then appliques them to the face with a blanket/buttonhole stitch or something similar.

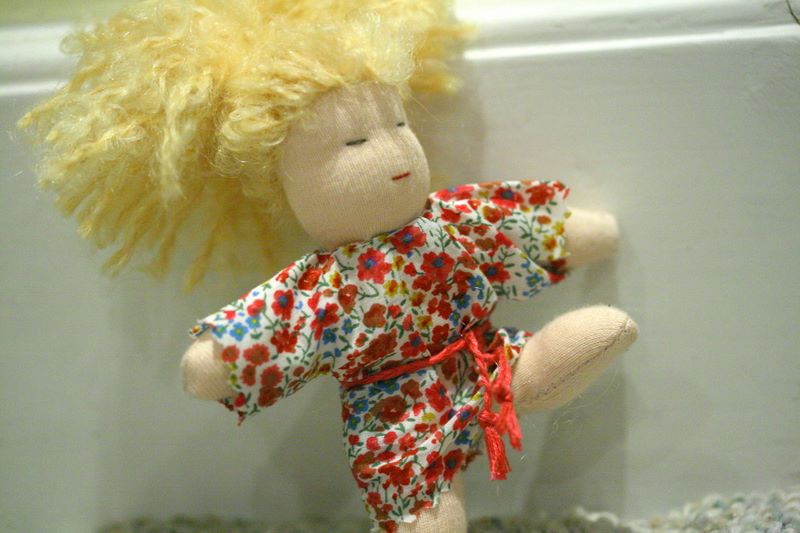
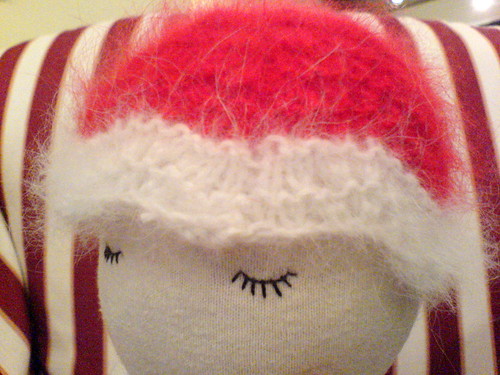
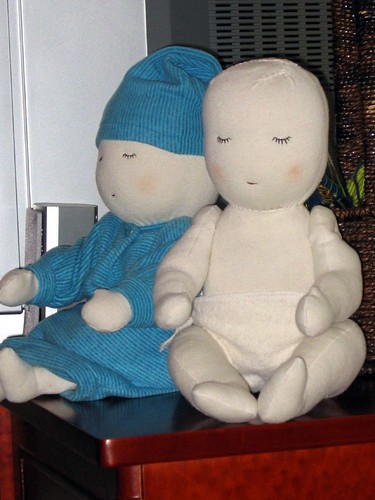
You can paint the face. You can embroider it. Or you can be minimalistic and leave the face blank, like I did here. This part really is all up to your imagination.

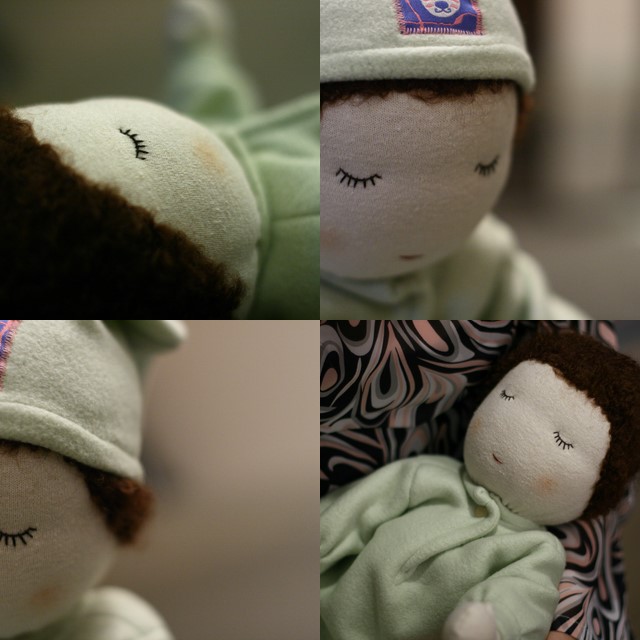
To embroider the face, you will first make a knot in the embroidery thread and then insert the needle from the back of the head, through the stuffing and out to the front. Embroider the eyes using your choice of stitches - satin, outline, anything. When you are finished, put the needle back through the head and create an ending knot on the other side. For Waldorf doll heads, you will need a 5" or longer doll needle for this step, because the head is really thick. But for the rag doll, you can use a regular needle because the head can be squished enough to send the needle through and out the other side without losing it inside the doll.
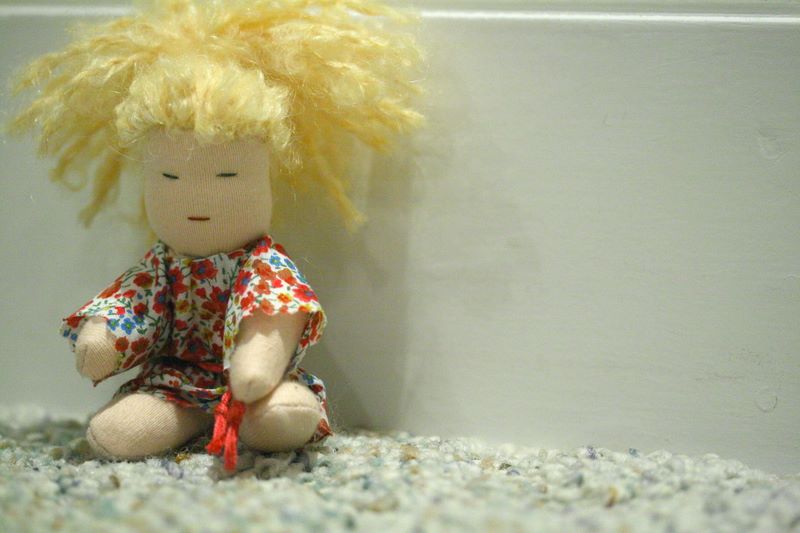
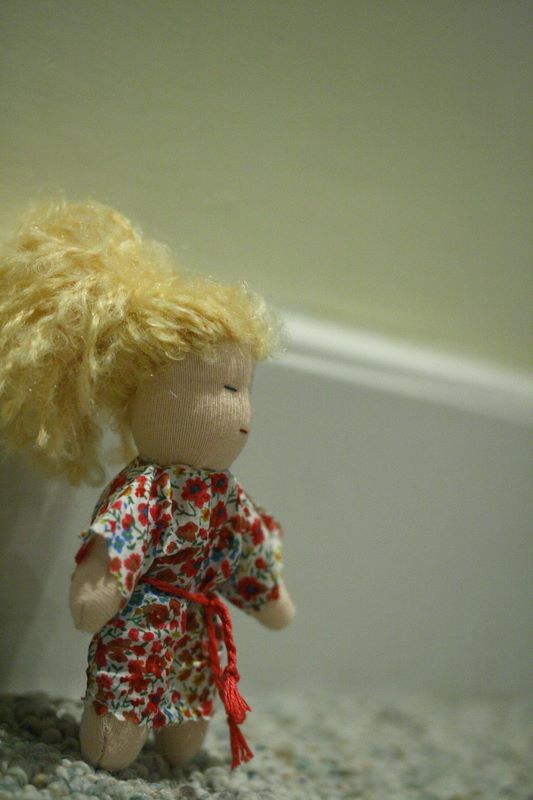
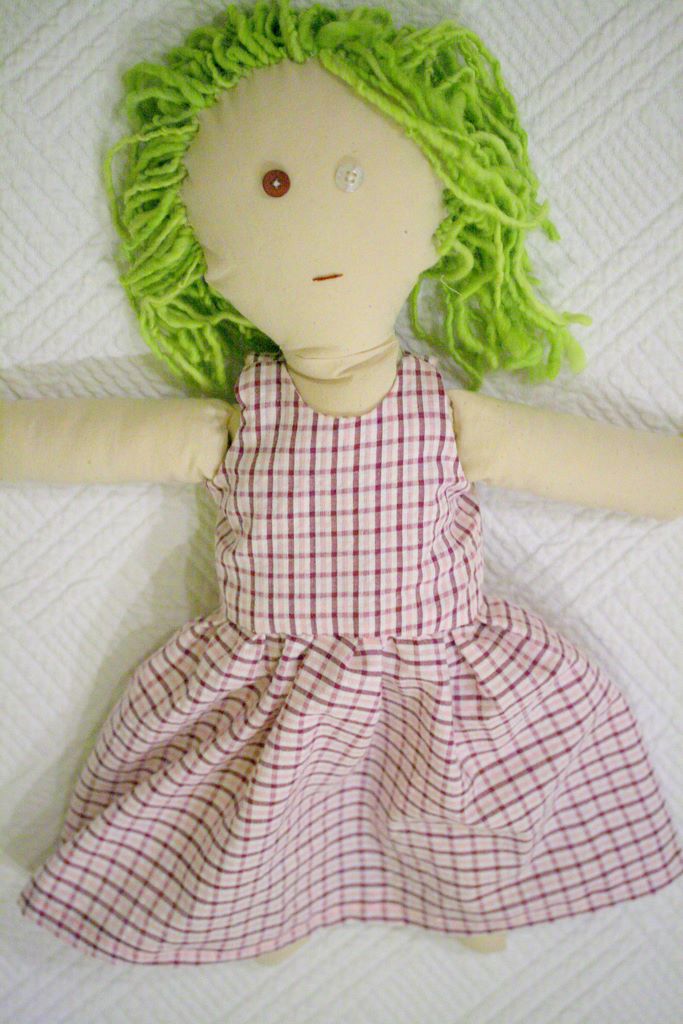
Making the Hair

Now, the reason that you can embroider the face from the back of the head is that the knots will be covered up by the hair. Hair can be made of many things, actually, like yarn, cloth strips and felt. Many people attach hair by hand sewing each piece to the head, while some people glue it down. I really like using yarn for hair, and I prefer to sew the pieces down. But that is just me.

Each hairstyle is different and requires special methods. For Miss Tiddley's hair, Chris threaded an upholstery needle (with a big eye) with the actual yarn used for the hair. He sewed the strands directly into the head along the crown, and then tied it back into a ponytail. This was quite quick and easy. Here is a link to a tutorial for a similar hair attachment method.

One of my recent hair favorites (one with no picture - alas!) was a Raggedy Ann-esque style with pieces that stuck out crazily all over the head. This method was really labor intensive, as each strand had to be hand tacked down with sewing thread. With one long piece of yarn, I created row after row of long loops. Each loop was sewn to the head twice: once with the thread looping around the yarn and into the head, and once with the thread through the yarn and then into the head for security. Then I snipped all of the loops open to create a wild, loose style.


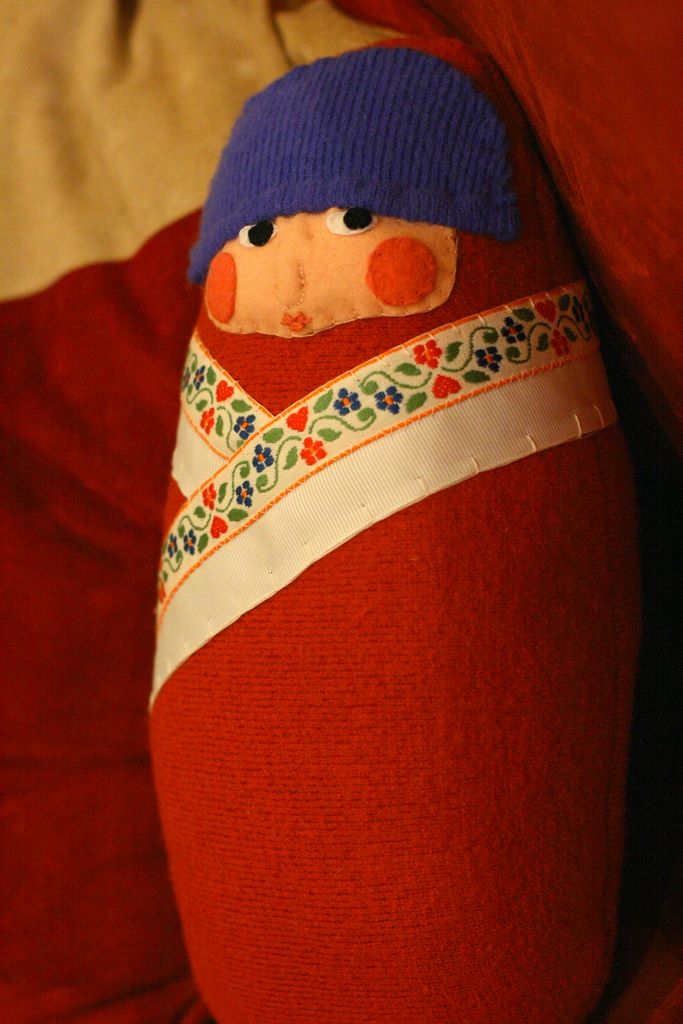
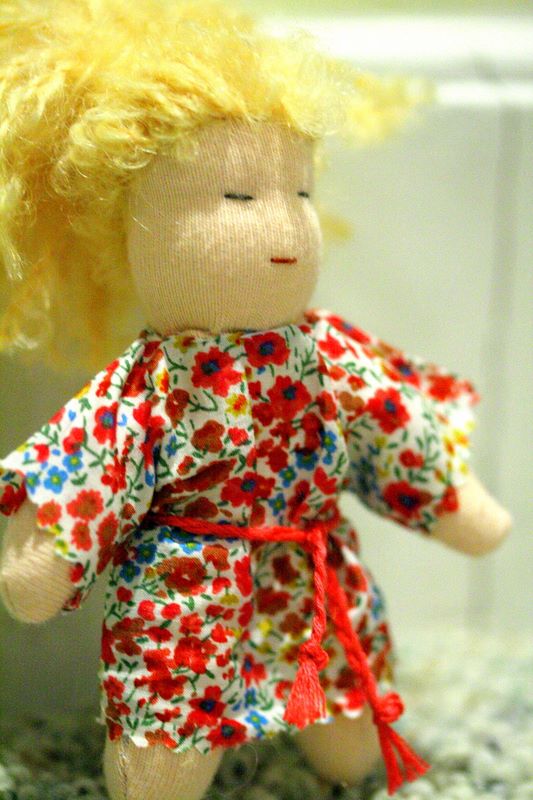
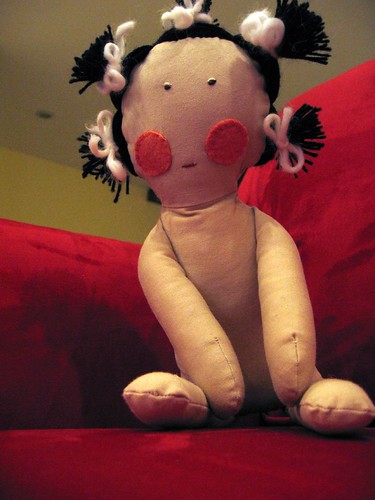
This little doll's hair was sewn down at the crown (piece by piece) and then looped back to the ponytail area where it was gathered into a bunch.

One of the best resources I have found for doll hairstyles is "Making Waldorf Dolls" by Maricristin Sealey. Pricey book, but maybe you can find it at your local library for free.

Elisa, I look forward to seeing your finished baby. Good luck!

Labels: ,

Tuesday, August 7, 2007

Mimi's Doll Workshop


When I traveled to the States a few weeks ago, I had the great luck to be able to run to Boston for one of Mimi's doll workshops. It was such a lovely day. There were eight of us learning, and we all had a blast digging through Mimi's scraps of wool and ribbon and deciding which baby to make. Her studio is incredible, filled with all of these amazing cloth dolls from her earlier dollmaking periods and lots of works in progress.

Earlier that day, I had a conversation with Chris about the workshop. I told him that, for me at least, the workshop was really a chance to learn some new techniques and to see and be inspired by Mimi's work. Chris said - No way! You are there to make and come home with a new baby! Indeed, I was. Chris was very pleased to see me arrive back in Beijing with the swaddled baby pictured above.

It was a great time. If you are near to Boston, I encourage you to stop in for her next workshop, whenever that may be.

Labels:

Sunday, August 5, 2007

An Early Birthday Gift

A few months ago, my mom called to say that she had found some adorable Japanese dolls at an antique market. "But I cannot figure out who I could buy them for..." she said. Luckily I was there to suggest a very worthy person who was having a birthday in August. Me, that is.


I finally got to see them when I visited the rents two weeks ago. These dolls are so very tiny and delicate. Unbelievable craftmanship. They seem to be made of wood and fabric, with removable heads.

I decided not to take them home with me just yet because I was afraid they would get damaged in transit. It was probably a wise decision, as my dad kept hinting that I needed to let them stay for a while. And that I would be able to take possession of my birthday gift when they pass away. Nature or nurture, I am not sure which, but it is clear we all come from the same mold.

Labels:

Thursday, August 2, 2007

New(er) Babies


When I was in Atlanta last week, my mom and I pulled out a number of her old childhood dolls from the attic. Some of them need desperate repairs - one poor baby has no arms at all - while others just needed a good scrub. Almost none of them have clothes that have survived. I took the baby floating in the picture above home. Once I have some free time, I can see about covering her chubby nakedness.

I think I would like to try to fix the two big dollies in the picture below. For sure I can replace their cloth bodies, which is the most obvious issue. More difficult will be the hair replacement on the one at the bottom left, which will probably require follicle transplants. Ha!


I found some interesting sources on doll repair, which I will have to look into once I get these kids to my house. Before I rip them apart, however, we need to take them to be appraised to make sure they aren't secretly valuable. There is not much chance of that, though. Cute as they are, these babies are not that old, were very well loved and seem to be pretty standard (i.e., probably many were made). Actually, I am rooting for "not valuable" so I can dig in and see what can be done to make them whole again and ready to be loved by a new generation.

Labels:

Sunday, June 17, 2007

And the Winner Is...

Stuckinanofficeinnyc - Congratulations! You have won the little Waldorf dolly. I am not sure how to contact you though, as you posted the comment anonymously. So please send me an email with an address. I'll be sure to send her right away.

Thanks very much everyone for playing along! I really enjoyed reading your comments.


And Chris, don't worry. I did a fair drawing.

Labels: ,

Tuesday, June 12, 2007

A Mini Celebration

Today is a special day. Not only is it my 100th blog post, but it is also the 200th day since our log-in-date (LID) with the CCAA. Since we are on the expedited path for receiving a referral, that means we are more than halfway to meeting our daughter. In celebration of these two small milestones, I am holding a mini* drawing.

If you leave a comment on this post, then I will enter your name into a drawing for this little one.


She is a four inch Waldorf-style doll made from a pattern in Maricristin Sealy's Making Waldorf Dolls. She is a poseable dollhouse doll, so she can sit,


stand and even do cartwheels.


Well, she needs some help with the cartwheels.

Her dress is made from a Liberty lawn fabric. And she has some CRAZY hair.

Shipping is on me. All you have to do is say hello for a chance to take her home!

*Pun intended. Har Har.

Labels: ,

Friday, June 8, 2007

Rag Doll Tutorial

Materials

Body fabric* - 0.5 yard
Embroidery floss for face – black and red
Needle and thread
Yarn for hair
Stuffing
Pattern

* For the example doll shown here, I used plain muslin which was dyed overnight in coffee.

Directions

1) Cut out all doll pattern pieces from body fabric.

2) Sew two arms and two legs together with right sides facing using 0.25 inch seam allowances.


Clip curves, trim, turn and press.


Stuff arms and legs lightly


and place aside.


3) Sew doll torso piece to head two times, right sides together. Press seam down toward torso.


4) Baste arms and legs to the right side of one of the new body pieces. These pieces should be sewn facing inward. When the doll is turned and stuffed, the arms and legs will stick out from the body.


5) Once the arms and legs are basted into position, place the second body piece on the first, right sides facing. The arms will be enclosed within the two body pieces, but the legs should hang out of the bottom. Sew around the body from the lower left corner (next to the left leg) to the lower right corner (next to the right leg).


6) Clip curves, trim and turn. Stuff body.


7) Sew doll bottom closed either by hand or by machine.


8) Use embroidery thread to make eyes and mouth.

9) Add yarn for hair.

Remember, rag dolls are not supposed to be perfect. They are better if they are a little wonky. Made with love.

That's all for this tutorial. I think I'll do a separate post on hair one of these days.

If you make a baby, please show me! I would be so excited to see her or him.

Labels: , ,

Wednesday, June 6, 2007

Doll Dress Tutorial

Let's start with a little tutorial for the dress that is included in the Rag Doll Pattern.

Materials

Dress fabric* - 0.25 yard
Needle and thread
Snaps or buttons

*Note that quilting cottons, linen or other light fabrics will be easiest. Heavier fabrics, like denim or corduroy will likely be difficult (or impossible) to turn at the shoulders.

Instructions


1) Cut out bodice pattern pieces from dress fabric.


2) Cut out an additional piece of fabric measuring 8 by 30 inches.

3) Sew bodice front to back at shoulders.


Press seams flat. You will have two bodice pieces. One piece will be the outer top and the other will be the lining.


4) Placing right sides of the two bodice pieces together, sew around neckline and down the two bodice back edges. I am using a contrasting color thread for illustration.


5) Sew left and right armholes.


6) Clip curves and corners, turn and press. When you turn, you are primarily pulling the bodice structure inside out, which involves pulling a lot of fabric through the narrow shoulder opening. You may want to use some tweezers to gently nudge it through. Again, using a lighter, thinner fabric helps this process.


7) Sew sides together. This is the last step to complete the bodice top. If you have never done this before, then take a moment to look at the remaining edges before you start sewing. You will basically start with the two ends of an armhole (sewn in step
5). Open up both sides, with the seam in the middle, and then bring them together - right sides facing - and sew straight across. Turn and press.


8) Prepare skirt. Fold and press 0.5 inches on one long side of the rectangular piece of fabric. Fold and press the same amount again. Topstitch over fold.


9) Sew the two short sides of the rectangle together, right sides facing, from the hemmed edge (step 8) to approximately 2.5 inches from the top edge (the un-hemmed long side). Press seam open and continue pressing up through the 2.5 inches of the unsewn area. If you like, you can cut a bias strip and sew it to the skirt opening. If you have never done this before or are feeling lazy, you can instead top stitch down over both sides of the skirt opening folds.


10) Run long gathering stitches along the unfinished (top) side of the rectangle. Typically, two gathering lines are run in case the first one breaks while adjusting. Run one 0.5 inches from the side and the second 1 inch from the side. If you have lots of experience, you can get away with one line. Pull gathering threads.

11) Align the bottom of the outer bodice to the gathered skirt, right sides facing. Pin, baste and then sew. This pattern is drafted with a large allowance on the bodice for attaching the skirt. Your final seam should be stitched 1.5 inches from the edge. If you prefer a narrower edge, just trim 1 inch from the bottom of the bodice and the top of the skirt and then use a 0.5 inch seam allowance. Once your skirt is attached, go back and trim the excess fabric.


12) Attach lining to skirt seam by hand. Topstitch if desired.


13) Finish the back of the dress with buttons, snaps or Velcro.

Labels: , ,

Tuesday, June 5, 2007

Rag Doll Pattern


This spring, I taught a doll making workshop here in Beijing. At the time, I couldn't find a free pattern to use that was really built for beginners. So, I developed my own. If you are looking for a basic rag doll pattern, feel free to download and use mine. Over the next week, I will put up two tutorials based on this pattern: one for the doll body and one for the dress. All of the instructions are in the pattern, though, so get started right away if you like.

This is Tiddlywinks. My husband made her in the workshop from the pattern. I think she is fabulous, especially with her luscious green hair.


The basic rag doll pattern also comes with a drop-waisted sundress pattern, as modeled by Miss Tiddly below.


When she is not modeling, however, Miss Tiddly likes to change into her overalls and relax.


Sometimes I wonder about Miss Tiddly, though. She keeps trying to snuggle up to my husband. Not sure if I trust her completely.

Labels: , ,

Friday, May 25, 2007

Hello Baby

And there she is. I see her fully now.


This one is off to a little girl in the US of A who has a birthday coming soon. If I pop her in the China post now, she just may make it in time.

We are off on a spontaneous weekend road trip to Datong. Off to see the buddhas and hanging monastary. Why? Well, because one day we are going to wake up and realize that our time is China is done and that we never saw the local sights.

So Carpe Buddha, I say.

Labels:

Thursday, May 24, 2007

Diaper Baby #2


New clothes for diaper baby #2. Now all she needs is hair.

Labels:

Tuesday, May 22, 2007

Lilo

Once upon a time, there was a little Lilo girl. She was waiting in a box of discarded stuffed animals. A nice couple came looking for treasures and saw that she was looking for a new family. So they paid 10 kuai and took her home.


She got a soapy bath and then rested in the warm sun. Her momma made her a new dress,


with a pink and purple zebra patch,


and her hair was braided and topped with a bow.


She waits, all ready, for her baby to come home.

Labels: ,

Tuesday, April 17, 2007

First Dolls


This past weekend, I made some of the First Dolls from Making Waldorf Dolls by Maricristin Sealey. These guys were incredibly simple to make and turned out to be pretty cool. The bodies are made from poly-cotton velour, so they are really snuggly. The heads are wool, but the book says that they will still be machine washable on the delicate cycle.


I need to find little jingle bells that I can sew into the tip of the caps. Each cap is then securely sewn to the head so there is no danger of baby extracting the bell and choking. But where to find jingle bells in Beijing? Hmmm, perhaps another trip to the fabric market is needed.

The pink one will be part of a gift for friends of ours in Shanghai who are expecting a baby girl in June. I also made her another petal bib from Leigh Radford's One Skein. Love that pattern.


Labels:

Wednesday, April 11, 2007

Let Down Your Long Hair


I finally finished the hair on one of my New Year's babies. The delay in completing him was due to many reasons: forgetting to order the mohair from Australia, waiting for the order to arrive, staring at the yarn next to my bald baby for the longest time. But now he is done. Over the past months, I have grown to understand that he is meant for a special little boy we know, whom we hope to visit in person this July.

Here is a better look at the hair in question. Doesn't the boucle add lovely texture and character?


I promise I will not repeat this shot when I have a live baby as a subject. On second thought, I really shouldn't promise anything at all.


Chris saw the baby a few weeks ago with his hair half finished and hanging down, and immediately named him Rapunzel. But that is not right. Not right at all. I have stared at him for a while now, trying to figure out his true name. But maybe it is not up to me, or Chris, to name him. Perhaps that job is for his friend to be. Welcome to the family, baby with no name.

Labels:

Friday, March 16, 2007

Freaky

I have been keeping my eyes open lately for Asian baby dolls for Miss G. I found a pretty cool baby in the Hong Kong airport once, so I have been on the lookout in airport stalls ever since. Mainland China airports, however, seem to have less attractive stock. On my way home from Shanghai tonight, I wandered by the toy section of a store in the HongQiao airport. A whole wall of dolls and almost every single one was blond and blue eyed.

I did find this one dark-haired doll hidden amongst the crowd.


Who had the bright idea to market the whore baby to the under four set? Why is it that out of all of those dolls, the only semi-Asian one I could find looks like she just strolled out of a hip hop club?

Labels: ,

Monday, February 12, 2007

My Craft is On (again)

February's theme: Hearts.


Miss Konichi has some lovely threads (So punny! har har).

Labels:

Monday, January 29, 2007

Konichi, Wassahp!?

In February, I am teaching a little rag doll workshop here in Beijing. I looked on the internet for free patterns that we can use, but I couldn't really find any that I liked. There seem to be a lot of themed, complicated, or even creepy patterns, but few basic ones. So I have been working to create an easy rag doll pattern that we can use in the class.

Introducing Prototype #1, or Miss Konichi, as Chris has named her.


I liked her hair quite a bit, but it was complex and fiddly. Also, her proportions were nice (except for the too skinny legs), but her narrow body means that sewing and turning her would be a challenge for people new to doll making. So she is cute, but not quite right. Back to the drawing board!


I have been using a trial version of Adobe Illustrator to make the test patterns. In this process, I have learned two main things. First, it actually has been very useful for making trial patterns - easy to adjust your work once you get the hang of the basic commands. Second, I totally need to take a class in this program before I pay $499 to own it. This program is crazy complex. To all of you who use illustrator to make cool images - Good on ya.

Labels:

Thursday, January 18, 2007

Rag Doll Workshop

In case you live in Beijing and are interested, I am hosting a rag doll workshop on Sunday, February 11 from 3 to 6
p.m. During this session, particpants will create and stuff one 16"
rag doll. We will not be making clothes, but we will discuss clothing
ideas and methods for you to finish him or her at home. Basic sewing
machine experience is helpful, but not required. You must, however, be
12 years old or older.

Workshop objectives: To gain experience constructing a basic rag doll,
understanding patterns and materials, exploring ways to recycle
materials into a lovable friend.

Location: Smallville Cafe in ShunYi

Cost: 25 RMB for tea and snacks provided by Smallville Cafe

Materials: I will provide all patterns and materials for this session.

How to sign up: Class size will be limited to 8 participants, so
please email me directly if you would like to attend (rebeccacoke at yahoo dot com). I will send an
email to those of you who have already expressed interest to confirm
your participation.

Thanks!

Labels:

Sunday, January 14, 2007

Hat for Which Baby?

One of my friends here in Beijing asked if I would be willing to knit some preemie hats for a local orphanage in ShunYi. I set to work with some stash yarn, but quickly realized that an angora cap is probably neither practical nor preferred for use on babies. Turns out it looks pretty cute on one of my resident babies, though. All she needs is a red velour/ white fake fur outfit so she can be a Christmas dolly.


Don't worry, I have cast on for another hat with more practical yarn.

Labels: ,

Wednesday, January 3, 2007

More Babies

Over the holiday break, some diaper material scraps were transformed from this...


into these babies.


The kiddo on the left is for a lady who runs a Kindermusik studio here in Beijing. The one on the right is for a little girl's upcoming birthday. They both desperately need hair, but they will have to wait a bit because mohair is hard to find 'round these parts.

Labels: ,

Monday, December 18, 2006

Christmas Crafting

Chris and I found a church here in the Burbs of Beijing. A few weeks ago, they announced a charity drive for children at the Hope Foster Home, which is a nearby orphanage for children with disabilities. So we picked two names and pictures from the stack, one boy and one girl, and created little gift boxes for the kiddos. Besides picking out warm fleeces, gloves, toothpaste, little cars and playdough to go in each box, the really fun part was creating dolls for them.

What three year old boy would not want one of these? Actually, I know a 33-year old boy who was quite jealous.

And then for the three year old girl, a baby doll made from Wee Wonderfuls' make-a-long Pattern "Olive". I really liked her with a simple face - only rosy cheeks.


Completely huggable. Too bad I can't see them open the gifts next Monday!

Labels:

Sunday, December 17, 2006

Little Waldorf Baby


This is a Waldorf-style baby doll made from a Magic Cabin kit - the 16" Sweet Cheeks baby. It was my first attempt at a fully formed baby doll with a sculpted head, and she was relatively simple to assemble. The hair took quite a while, though, because the instructions called for a crocheted mohair wig. I do not crochet and all attempts at self-instruction through web-searches and pictures were abysmal failures. After six months of staring at a bald headed baby, I ordered "Making Waldorf Dolls" by Maricristin Sealey, which has a section on making hair that saved the day. I took the doll with me on a business trip from Beijing to Shanghai last month so I could finish up the hair on the plane. I got some serious double takes in the airport as I passed through security. All of the ladies manning the x-ray machine came up to investigate and touch my baby.

Labels: ,