
Rag Doll Tutorial
Materials
Body fabric* - 0.5 yard
Embroidery floss for face – black and red
Needle and thread
Yarn for hair
Stuffing
Pattern
* For the example doll shown here, I used plain muslin which was dyed overnight in coffee.
Directions
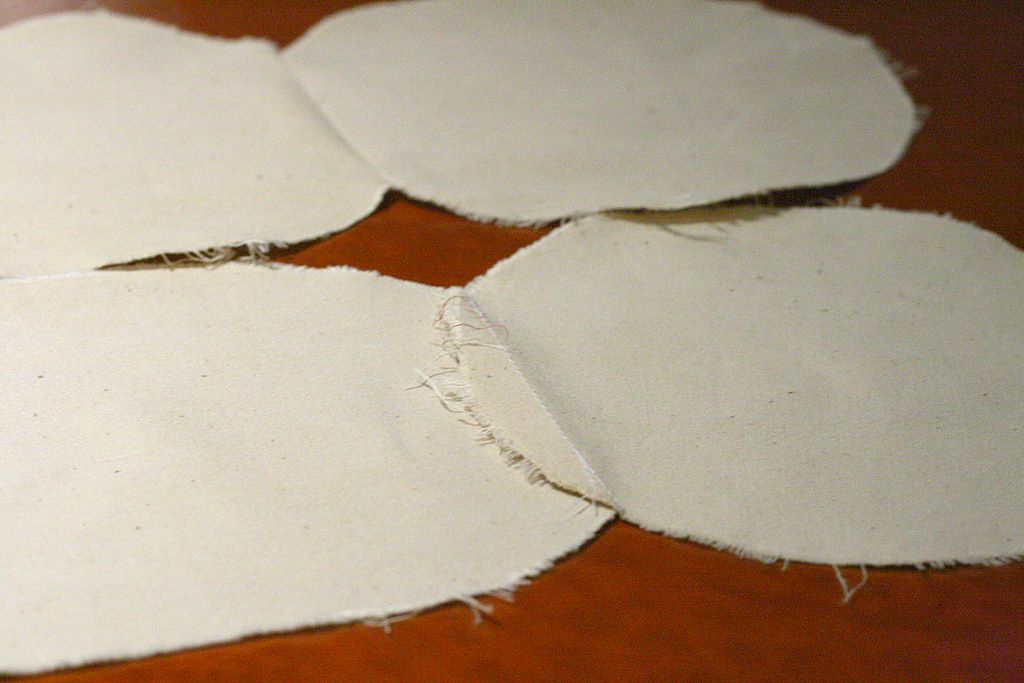
1) Cut out all doll pattern pieces from body fabric.
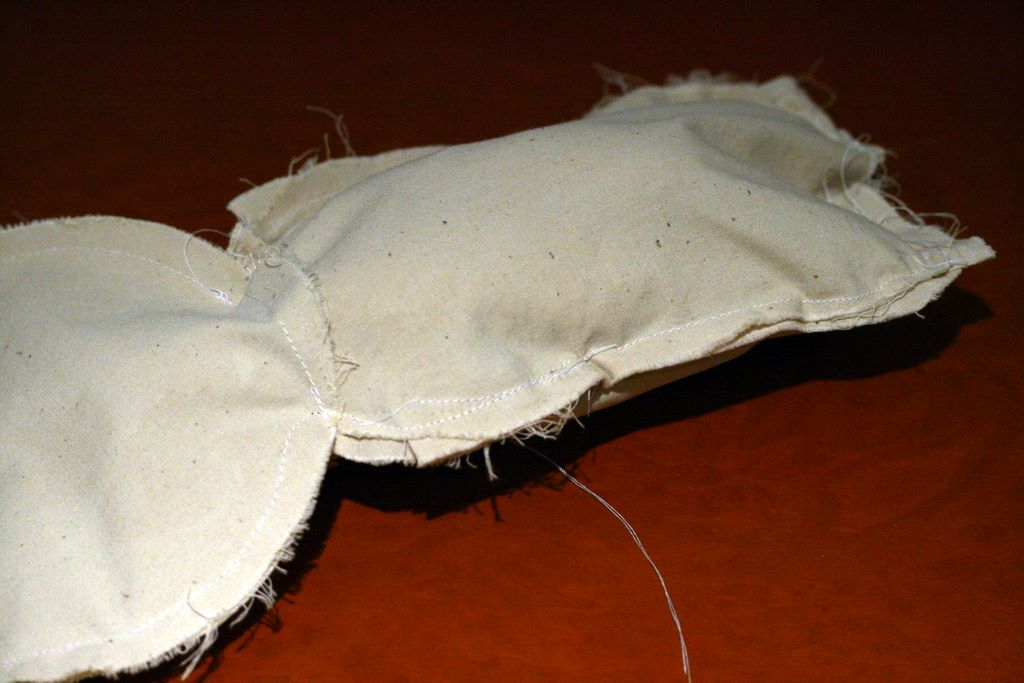
2) Sew two arms and two legs together with right sides facing using 0.25 inch seam allowances.
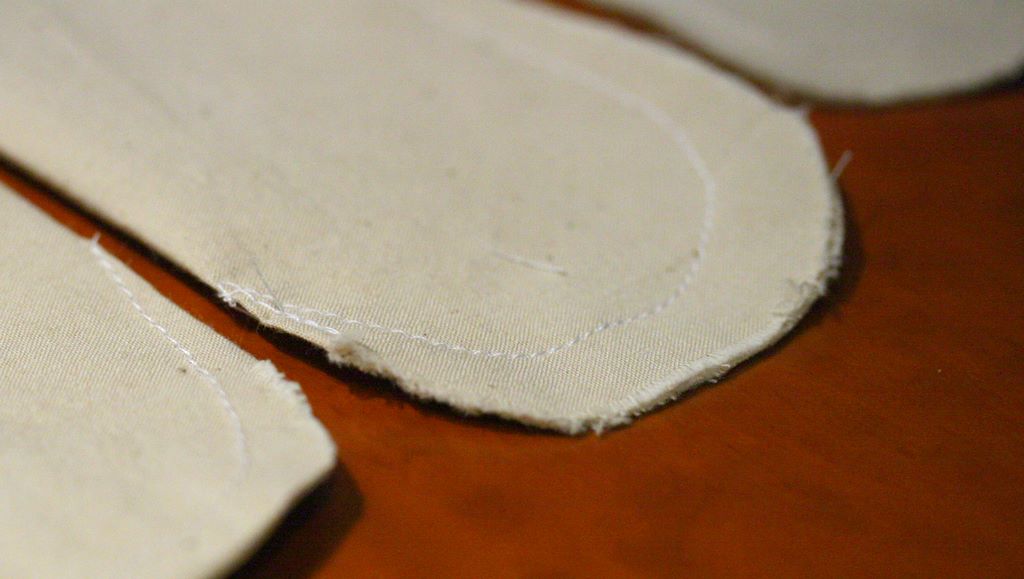
Clip curves, trim, turn and press.

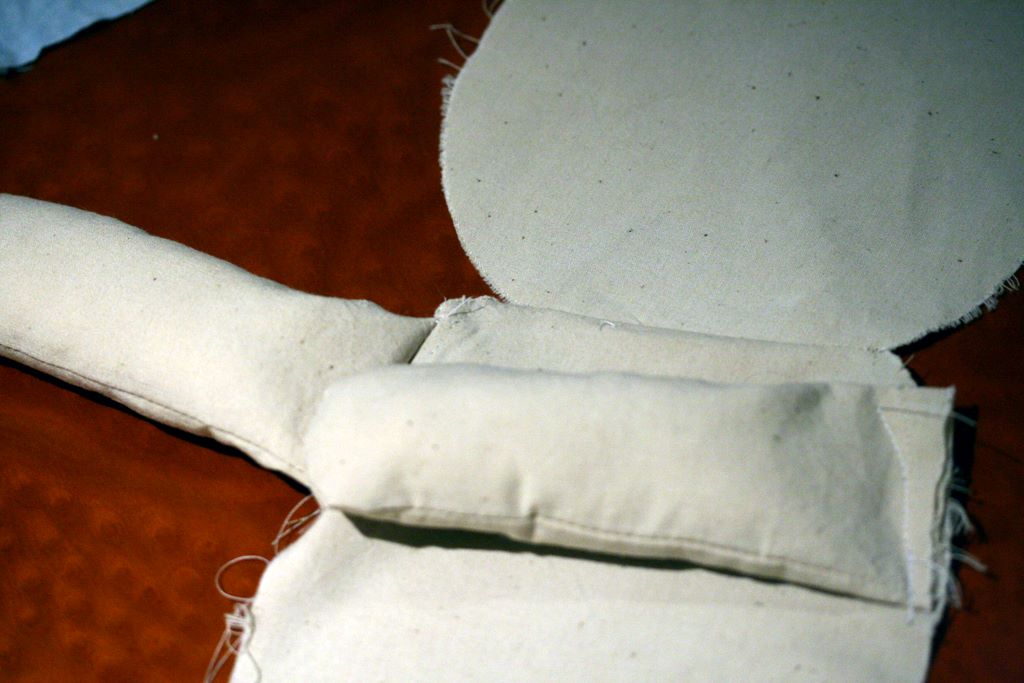
Stuff arms and legs lightly

and place aside.

3) Sew doll torso piece to head two times, right sides together. Press seam down toward torso.

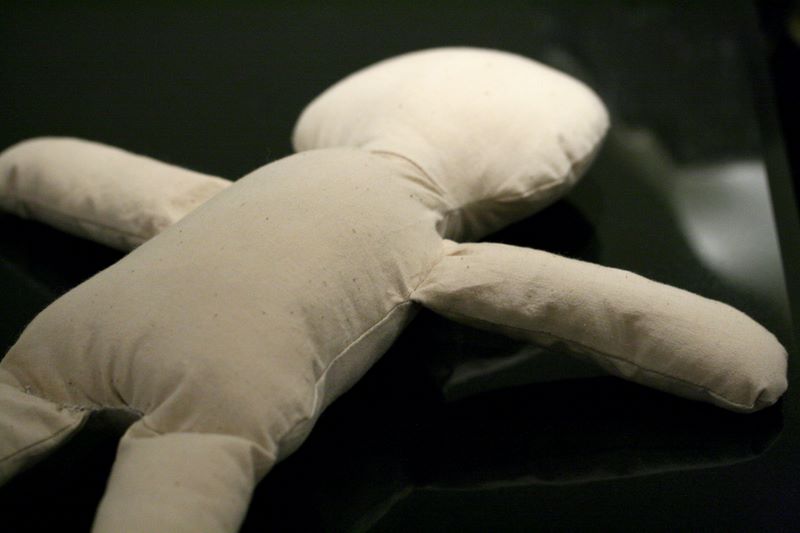
4) Baste arms and legs to the right side of one of the new body pieces. These pieces should be sewn facing inward. When the doll is turned and stuffed, the arms and legs will stick out from the body.
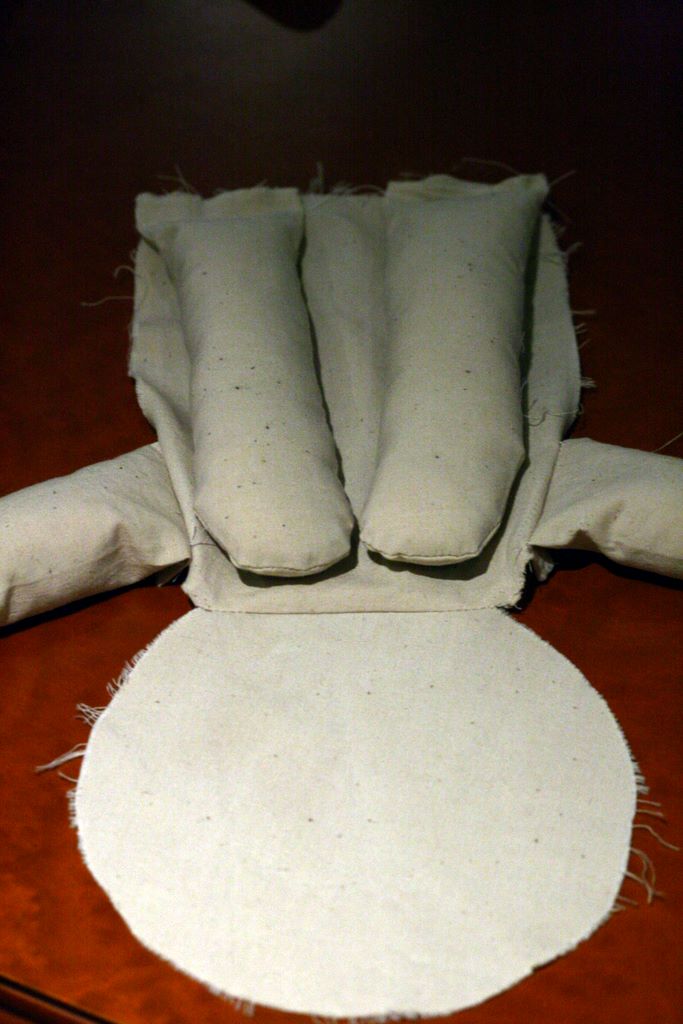
5) Once the arms and legs are basted into position, place the second body piece on the first, right sides facing. The arms will be enclosed within the two body pieces, but the legs should hang out of the bottom. Sew around the body from the lower left corner (next to the left leg) to the lower right corner (next to the right leg).
6) Clip curves, trim and turn. Stuff body.
7) Sew doll bottom closed either by hand or by machine.
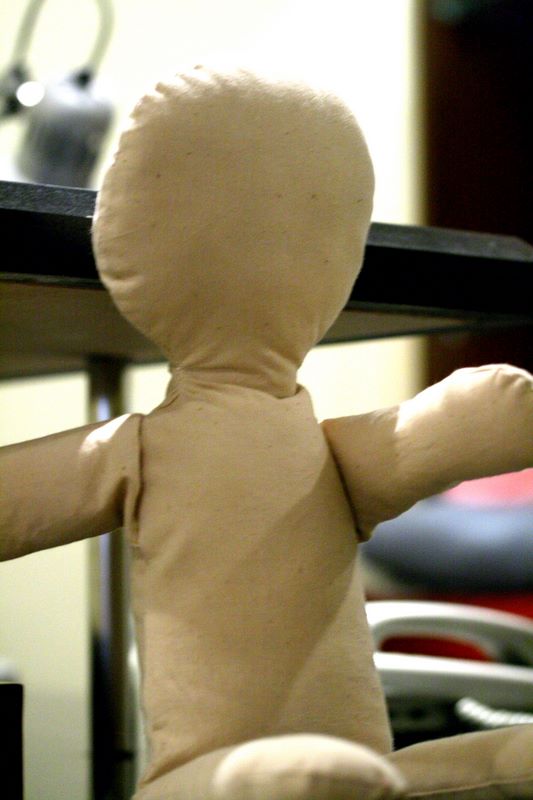
8) Use embroidery thread to make eyes and mouth.
9) Add yarn for hair.
Remember, rag dolls are not supposed to be perfect. They are better if they are a little wonky. Made with love.
That's all for this tutorial. I think I'll do a separate post on hair one of these days.
If you make a baby, please show me! I would be so excited to see her or him.
posted by Rebecca @ 11:04 PM
![]()

4 Comments:
Hi
I've just managed to complete one of your fabulous ragdolls. I am so pleased, as I have never made toys before and I'm a novice sewer, so handling the machine round all the curves etc was a challenge!
Now I have the body I'm not sure how to do the face and hair. I'm wondering how I do the eyes and mouth as normally I'd have expected the face to be done before sewing up so the knots are hidden inside the doll. Maybe I'm just being thick! Also, are you any further forward on a hair tutorial? Love your blog, and thanks for inspiring me. Hopefully you'll get to see my daughter's first doll once it's finished :)
I see this was posted way back in 2007 but I wanted to let you know that I found your tutorial on Google today and just whipped up a quick doll for my 9 year old. She is so jazzed! Thanks for the pattern and easy to understand instructions!
thank you for your tutorial !
I have look it everywhere for the rag doll .
i'll use it for my school work . love your tutorial ! :D
i looked everywhere for a good rag doll pattern so many of them were UGLY i was about to give up but then i found this thanks so much for posting.
Post a Comment
<< Home